


Now that air travel is gradually returning back to normal, I find it timely to share my experience in applying for a US B1/B2 visa for my kid via the interview waiver program (i.e. no more personal appearance in the US Embassy). This used to be applicable only for renewal of 10 year multiple entry B1/B2 visas, but they have expanded the coverage late last year to first time applicant minors below 14 years old and those above 79 years of age. The process this year has actually gotten simpler compared to when I first did it late last year. Hope this blog post helps you to do the application process yourself seamlessly.

Please note that this process only applies to first time applications and visa renewals of minors under 14 years of age whose either or both parents have a valid US B1/B2 (Business/Tourist) Visa. As for my case, I am an unmarried solo parent and my kid (10 y/o) is under my sole custody (we have different surnames) and I was able to process my kid's application by submitting only my visa.
To summarize, here are the qualifications for availing of the interview waiver program for minors below 14 years of age:
1. Minor must be below 14 years old at the time of the application
2. Minor must be present in the Philippines at the time of application
3. Either or both parents must have a valid US B1/B2 visa
Step by Step Guide:
1. Pay the necessary visa fees
This step can actually go before or after accomplishing the DS-160 form. But I find it easier to pay for the visa fees first because it takes at least 24 hours for the payment to reflect. I opted to pay via RCBC over the counter which was more convenient for me. There's also an option to pay online via Pesonet.
For over the counter payment, generate and print a US visa fee deposit slip (best fits 8.5x13 sized paper) which you can obtain from the payment information page. As of writing, the visa payment costs $160 or Php 8640. Aside from the deposit slip and payment, they also ask for the birthday and contact number of the applicant so make sure to have those ready.
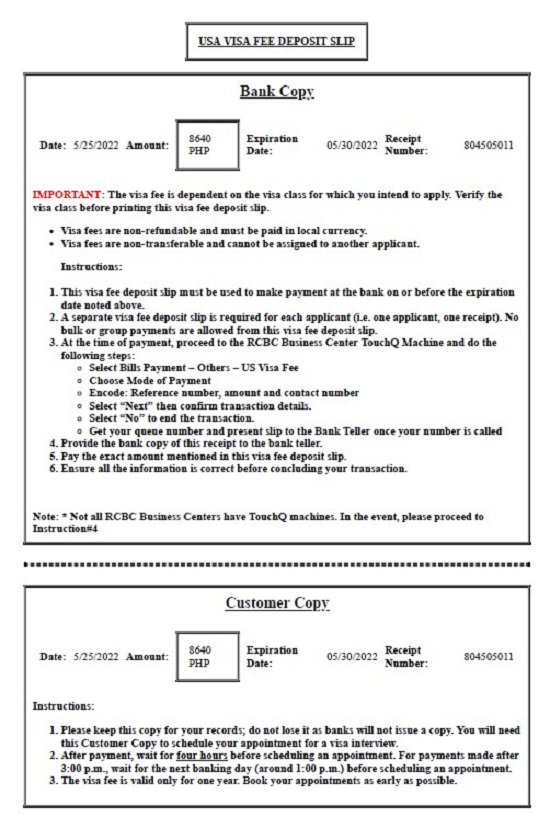
Be sure to secure the customer copy of the deposit slip or at least take note of your receipt number as they only validate the same and no longer issue a separate deposit slip.
2. Accomplish the DS-160 Form (Non-immigrant Visa Electronic Application Form)
This is probably the most tedious part of the process. To start an application, go to the DS 160 application page and choose Manila, Philippines as the location. Be sure to take note of your application number because I got timed out multiple times even if I was actively answering the online form. This will enable you to retrieve your application so you won't have to start a new one every time.

Also, it helps if you prepare your answers beforehand so that you'll be able to accomplish it faster without the session timing out. Questions include Personal Details, Travel Document (Passport) Information, Travel Information (esp. if you already have an intended travel date), US Contact Information, Family Information, and Security and Background Information. For my kid's application, I used my own mobile number and email address since my kid doesn't have one yet.
You'll need a digital copy of your 2x2 photo for this part. For the photo, I suggest having it done at a studio for ease. They'll be able to send you a digital copy as well which you can use for the DS 160 application.

After signing the form, you'll be referred to the DS-160 confirmation page. Be sure to print a copy as it is one of the requirements for submission to the embassy. Lastly, I encourage you to save a PDF copy or a printed copy of your application. It will help you a lot in renewing your kids' visas in the future.
3. Make an account at the Apply for a US Visa Website
To generate an interview waiver confirmation letter, you need to create an account at the Apply for a US Visa Website. Make sure that you are in the website for Philippines! Just like in the DS-160 form, I used my personal email to create an account.

Make sure that the information that you placed here are the same with the details you furnished in the DS-160 form. Otherwise, you may encounter problems in your application.
 |
| Make sure to choose B1/B2 in the application. Otherwise, you will not be able to generate an interview waiver confirmation letter. |
After placing your details, you will be asked if the applicant is below 14 or over 79 at the time of the application to which you should answer YES. You will no longer be asked to schedule an appointment for an interview by clicking yes. Last year, this used to be a series of questions only applicable for renewals that you have to answer yes despite not being applicable just to generate an interview waiver letter, thankfully they were able to fix it already.

You'll then be asked the shipping details where they will mail your passport after processing the application. Be sure to accurately put your address. Lastly, you'll be asked to put in the receipt number to validate payment. The interview waiver letter will be generated after this step. Print a copy for submission to the US embassy.

4. Submit the application via LBC
The US Embassy in the Philippines changed their courier to LBC this year. Last year, we were able to submit our visa renewals via 2GO SM Fairview branch since it was the nearest one to us. However, when I submitted an application this year, I learned that only select branches accept US visa applications. If you are from northern QC (i.e. Fairview), you may opt to go to their Don A. Roces Ave branch (located at 68 Don A. Roces Ave., QC) because they open before mall hours. Otherwise, you may also visit SM Cubao and Robinsons Magnolia in Quezon City.

Drop offs last year via 2GO used to be free of charge. However, drop offs via LBC now cost Php 440, except when dropping it off at the LBC SM Mall of Asia branch which remains free.
Be sure to include the following documents in your application:
- Valid Passport
- Two (2) 2x2 photos
- Printed Interview Waiver Confirmation Letter
- Printed DS-160 Confirmation Page
- Original PSA Birth Certificate
- Photocopy of valid US B1/B2 visa of parent/s
I placed everything in a small brown envelope and they'll be placed inside an LBC pouch. Be sure to check if all docs are complete before mailing!
5. Wait for your kid's passport
Since these are first time applications, they took longer than renewals. Our renewal only took less than a week from the time we submitted our visas via 2GO until we received them via mail. For my kid's application, it took more than a month before it was issued so I got worried when my kid's passport wasn't mailed in a week. I was able to monitor the application here.
For reference, here's the timeline of my kid's application:
Sent via courier - Dec 17, 2021
Case created - Jan 5, 2022
Application received - Jan 10, 2022
Administrative Processing - Jan 24, 2022
Issued - Jan 25, 2022
UPDATE: We were able to process my nephew's application via the same procedure and the wait times are slightly shorter now.
Sent via courier - May 25, 2022
Application received - Jun 1, 2022
Administrative Processing - Jun 3, 2022
Issued - Jun 6, 2022
Received - Jun 9, 2022

I was able to receive my kid's passport with visa on January 25. Upon delivery, we were required to furnish a delivery fee of Php 440 by LBC. Along with the passport, they also returned the original copy of the birth certificate submitted.
Basically, that's it! It's actually easy to follow, especially now that they have fixed their CGI website. Hope this helps you in your kid's application and happy travels!
XO, Mish
"checks unlimited: Your trusted partner for personalized checks and financial convenience."
ReplyDeleteyes
ReplyDelete"Working with Wiso Digital on our digital marketing changed everything." They made custom plans that increased people's awareness of and interest in our brand. Their knowledge of SEO, PPC, and social media marketing brought in a lot of visitors and made a lot of sales. We're thrilled with the outcome!" Sign up
ReplyDeleteAs someone who reads daily, the Kindle app has become essential. I can start a book on my phone and finish it on my tablet—flawless syncing!
ReplyDeleteShop Now
The Alera 5-Drawerfiling cabinet offers sleek aesthetics without sacrificing functionality. The post explains its drawer capacity and durability clearly. Great resource if you care about both form and function.
ReplyDeleteI’ve been in construction long enough to know that good estimates are the foundation of a profitable job. This article really nails why outsourcing to experts like Prime Estimation pays off. Better accuracy means fewer headaches later.
ReplyDeleteMore info = outsourced concrete takeoffs
I love how you emphasize using advanced tools in commercial estimating services. Digital takeoffs, BIM, AI analytics—they all speed up estimating and boost accuracy for huge projects. This guide makes the value crystal clear.
ReplyDeleteI like how this resource highlights the wide range of Commercial construction cost
ReplyDeletefor different types of buildings like offices, warehouses, and hotels
Need help preparing construction estimates? Our freelance estimating services deliver accuracy, speed, and value. From material takeoffs to cost breakdowns, we handle it all so you can focus on building — click here to get your estimate today!
ReplyDeleteI really enjoyed reading about the importance of precision in construction estimating. It’s something many contractors overlook.
ReplyDeleteWe trust cost estimating professionals to guide our budgeting process. Their thorough review of project specifications, materials, and labor requirements helps us avoid costly mistakes. Their reliability and accuracy make them an essential part of our project strategy. click here
ReplyDeleteThis comment has been removed by the author.
ReplyDeleteGreat article—this is a very clear explanation of how accurate construction cost estimating impacts project success. I especially liked the point about detailed quantity takeoffs and updating estimates as designs evolve.
ReplyDeleteIn our experience, using structured estimating processes and trade-specific takeoffs helps contractors reduce budget overruns and bid more competitively. We’ve seen this make a big difference on both residential and commercial projects.
Thanks for sharing such practical insights. For anyone interested, at Paradise Estimating we also share estimating tips and real-world examples.
amazon products seo service in uae
ReplyDeleteAmazon Product SEO Services in UAE: Boost Visibility and Drive Sales
In today’s competitive eCommerce landscape, simply listing your products on Amazon is not enough. With thousands of sellers competing for customer attention, Amazon Product SEO services in the UAE have become essential for brands that want to increase visibility, improve rankings, and maximize sales. Whether you are a startup, private label seller, or an established business, optimizing your Amazon listings is the key to success in the UAE market.
Why Amazon SEO Matters in the UAE
The UAE is one of the fastest-growing eCommerce hubs in the Middle East, with Amazon.ae serving millions of active buyers. Customers rely heavily on Amazon’s search results to make purchasing decisions. If your product does not appear on the first page, your chances of making sales drop significantly. Professional Amazon SEO services in the UAE ensure your listings are fully optimized to match Amazon’s A9 algorithm and buyer search behavior.
What Is Amazon Product SEO?
Amazon Product SEO focuses on optimizing every element of your product listing to improve search rankings and conversion rates. This includes keyword research, product titles, bullet points, descriptions, backend search terms, images, and enhanced brand content (A+ Content). Unlike traditional SEO, Amazon SEO is sales-driven, meaning optimization is focused on both visibility and conversions.
Key Features of Amazon SEO Services in UAE
A reliable Amazon products SEO service in UAE offers a complete optimization strategy, including:
Advanced Keyword Research using high-volume, buyer-intent keywords relevant to UAE shoppers
Optimized Product Titles that follow Amazon guidelines while maximizing keyword placement
Compelling Bullet Points & Descriptions that highlight benefits and features
Backend Search Term Optimization to capture hidden search traffic
A+ Content Optimization for better branding and higher conversion rates
Competitor Analysis to outperform top-ranking listings in your niche
Benefits of Hiring an Amazon SEO Expert in UAE
Working with an experienced Amazon SEO agency or consultant in the UAE provides measurable advantages. Optimized listings gain higher organic rankings, increased traffic, better click-through rates, and improved conversion rates. This results in lower advertising costs and higher return on investment (ROI). Additionally, local expertise ensures compliance with UAE market trends, customer preferences, and Amazon.ae policies.
Who Needs Amazon Product SEO Services?
Amazon SEO services are ideal for private label sellers, wholesalers, manufacturers, and UAE-based brands looking to scale their online business. Whether you are launching a new product or struggling with low sales, professional Amazon product listing optimization in UAE can transform your performance.
Conclusion
Investing in Amazon Product SEO services in UAE is no longer optional—it’s a necessity for sustainable growth on Amazon.ae. With expert optimization, data-driven strategies, and a deep understanding of the UAE market, your products can rank higher, attract more customers, and generate consistent sales. If you want to dominate your niche on Amazon, professional SEO is the smartest step forward.
If you're looking for reliable construction estimating services, we’re here to help. At Paradise Estimating, we provide accurate quantity takeoffs and detailed cost estimates to help contractors and builders bid with confidence. Our team focuses on precision, fast turnaround times, and competitive pricing to support projects of all sizes. Feel free to connect with Paradise Estimating for dependable estimating solutions!
ReplyDeleteThanks for sharing such valuable information with the community. Proper estimation plays a key role in meeting deadlines and budgets. Construction Estimating California delivers accurate and timely estimates.
ReplyDeleteThis comment has been removed by the author.
ReplyDeleteThis comment has been removed by the author.
ReplyDeleteAt MEP Estimating, we provide accurate and detailed residential mechanical estimating services to help contractors bid with confidence. We carefully quantify HVAC systems, ductwork, ventilation, and all mechanical components to ensure nothing is overlooked. Our goal is to help you reduce costly errors, improve bid accuracy, and stay on budget throughout your residential projects.
ReplyDeleteThe Tuttio Sport ebike affiliate program allows you to earn commissions by promoting their electric bikes through custom referral links. You can share these links across your website, blog, or social media and earn on each sale generated. It’s a simple way to monetize your content while promoting eco-friendly, high-performance transportation options.
ReplyDeleteVery helpful article! Construction Takeoff Services improve bidding accuracy and reduce material waste. The way this blog explains the process makes it valuable for construction companies and estimators.Construction Takeoff Services
ReplyDelete